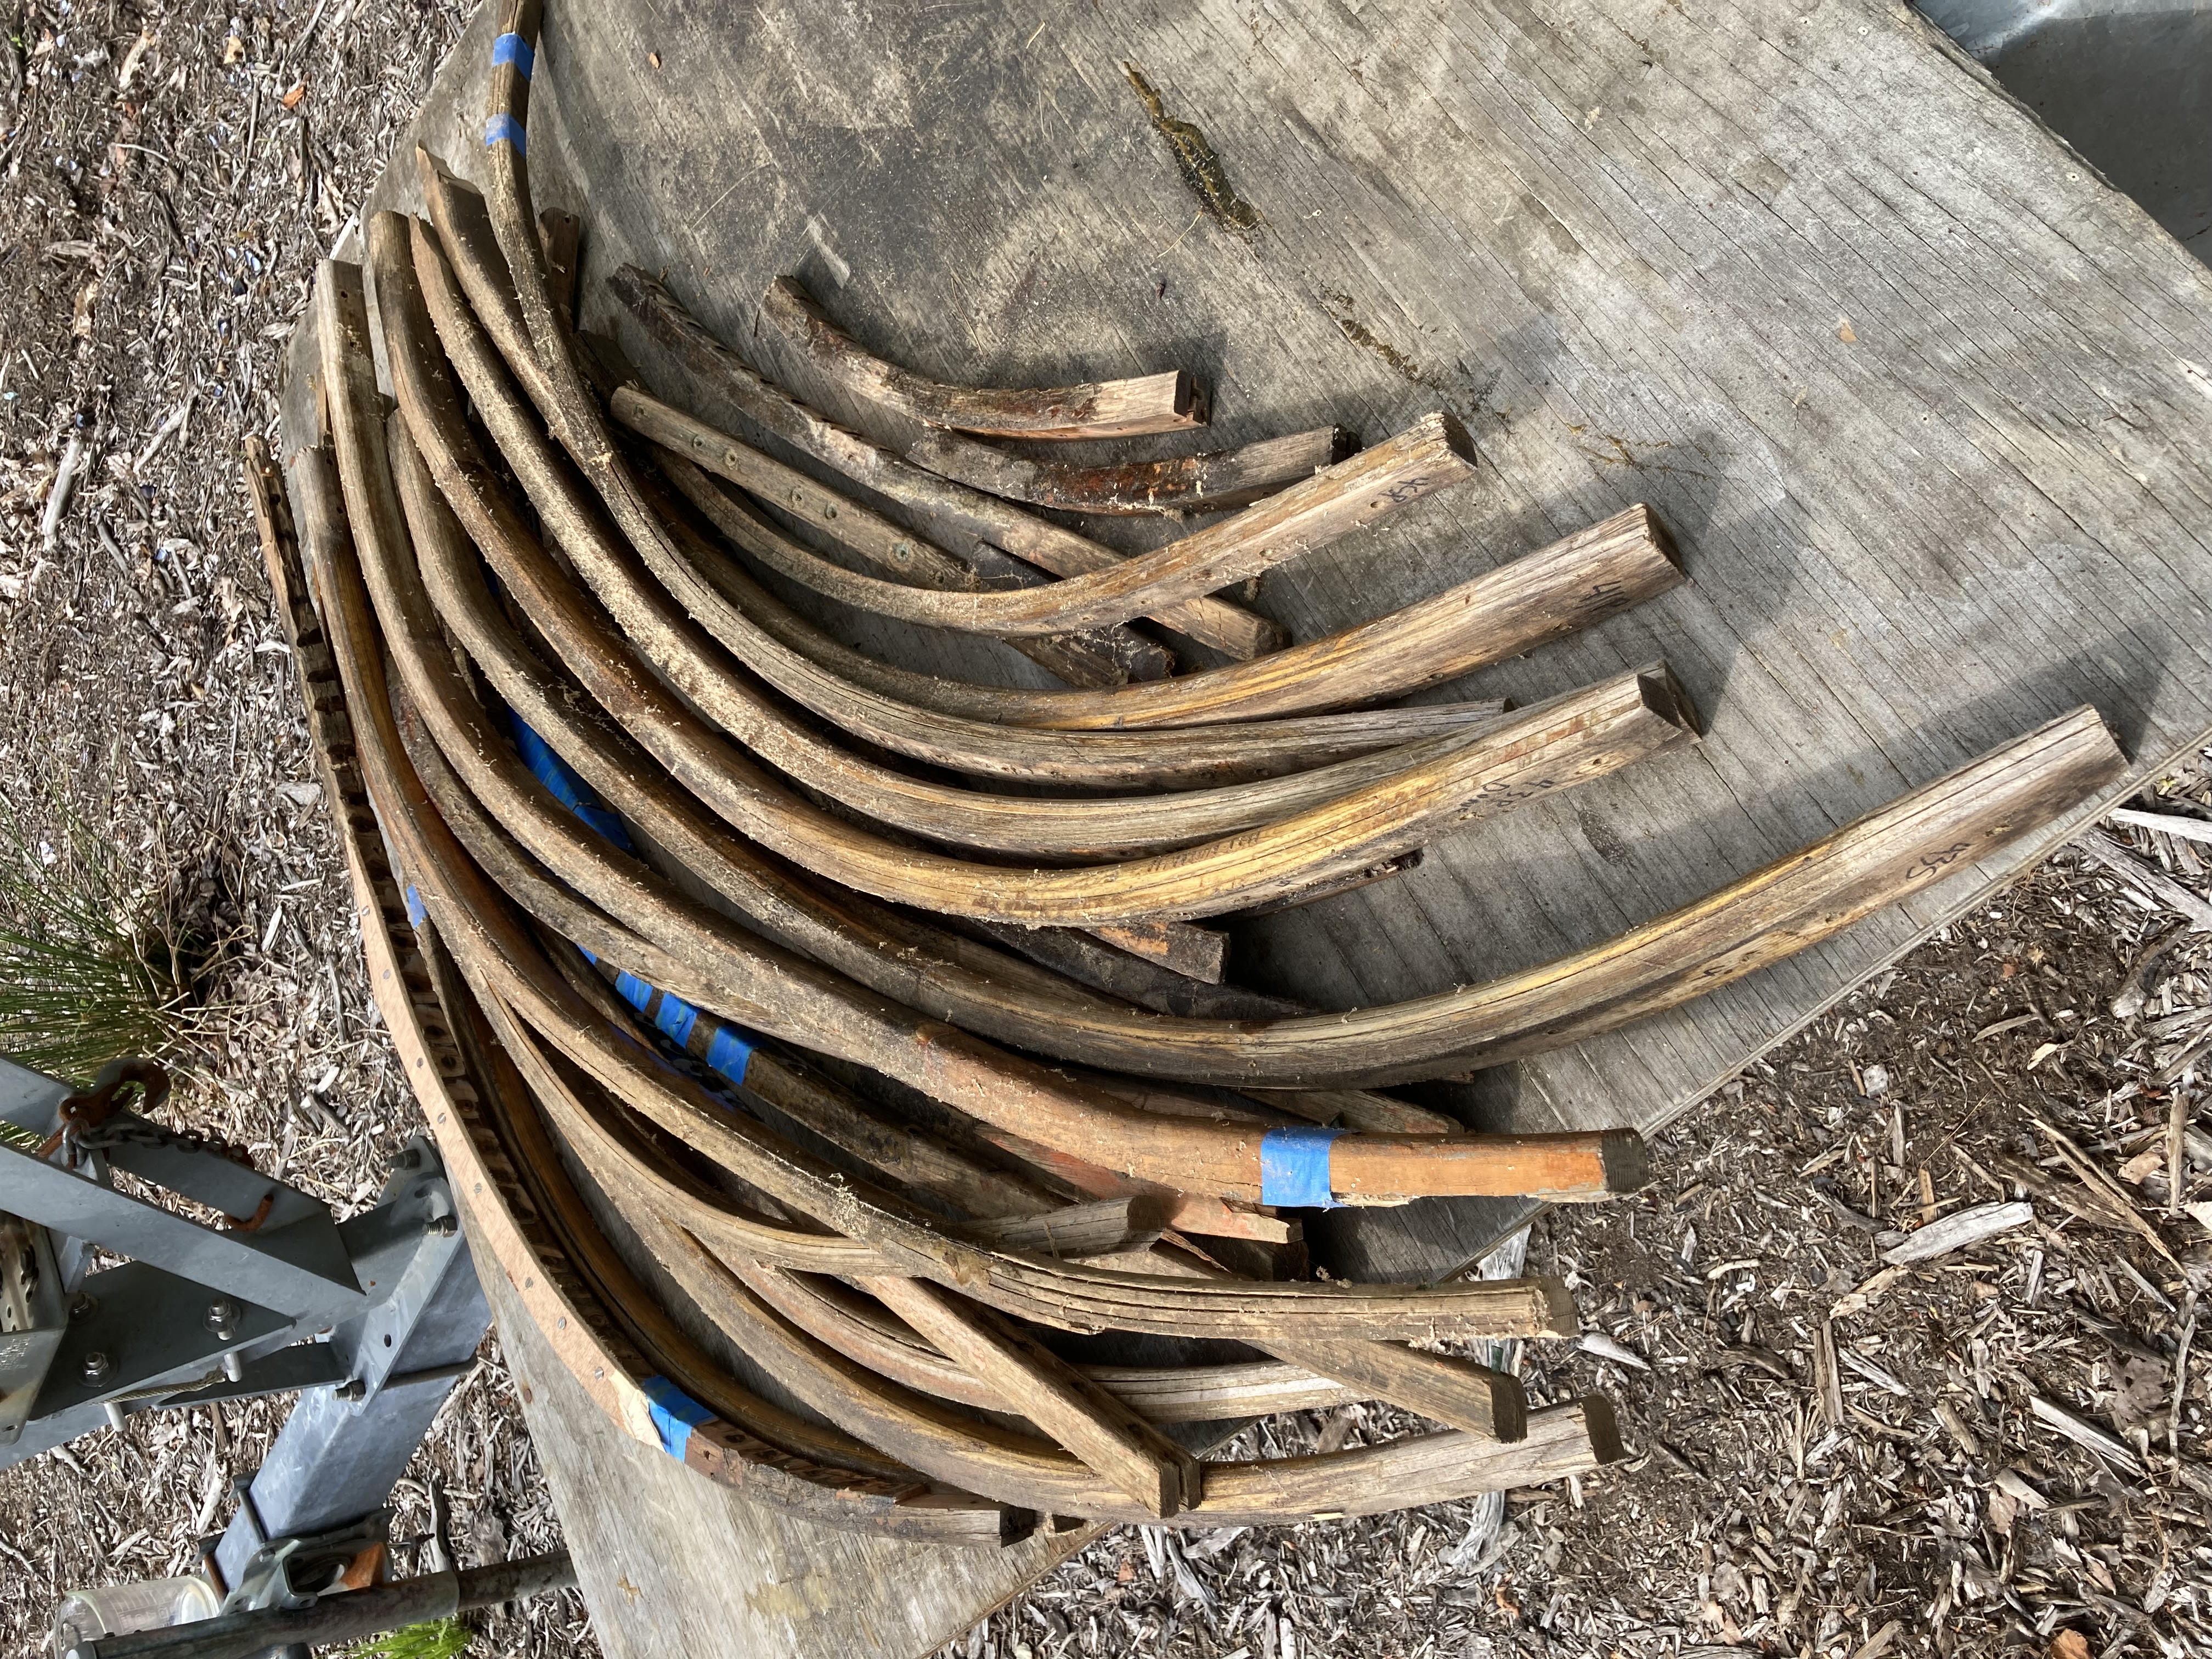
Frames are the ribs of a wooden boat. They run athwartships from the keel up to the covering boards, and every plank in the hull is fastened to them. If the backbone is the spine, the frames are the ribcage that gives the hull its shape and holds the skin together. Almost all of Ariadne’s frames were broken in one way or another.
Ariadne’s original frames were steam-bent white oak, installed by her Swedish builder in the early 1930s. They were copper riveted — no iron sickness to worry about — and after ninety years the wood itself was still in remarkably good shape. The problem was tension cracks. Nearly every frame had developed fractures along its outboard face, which is a classic failure mode for steam-bent frames: the wood is forced around a curve and stores tremendous internal stress, and over decades of wetting and drying cycles the outside of the bend eventually gives way. It is the outer face of a bent frame that is under tension, and wood is stronger under compression than tension. We previously laminated a batch of replacement frames for the forward third of the boat, but the remaining stations still needed attention.
The plan: steam bending
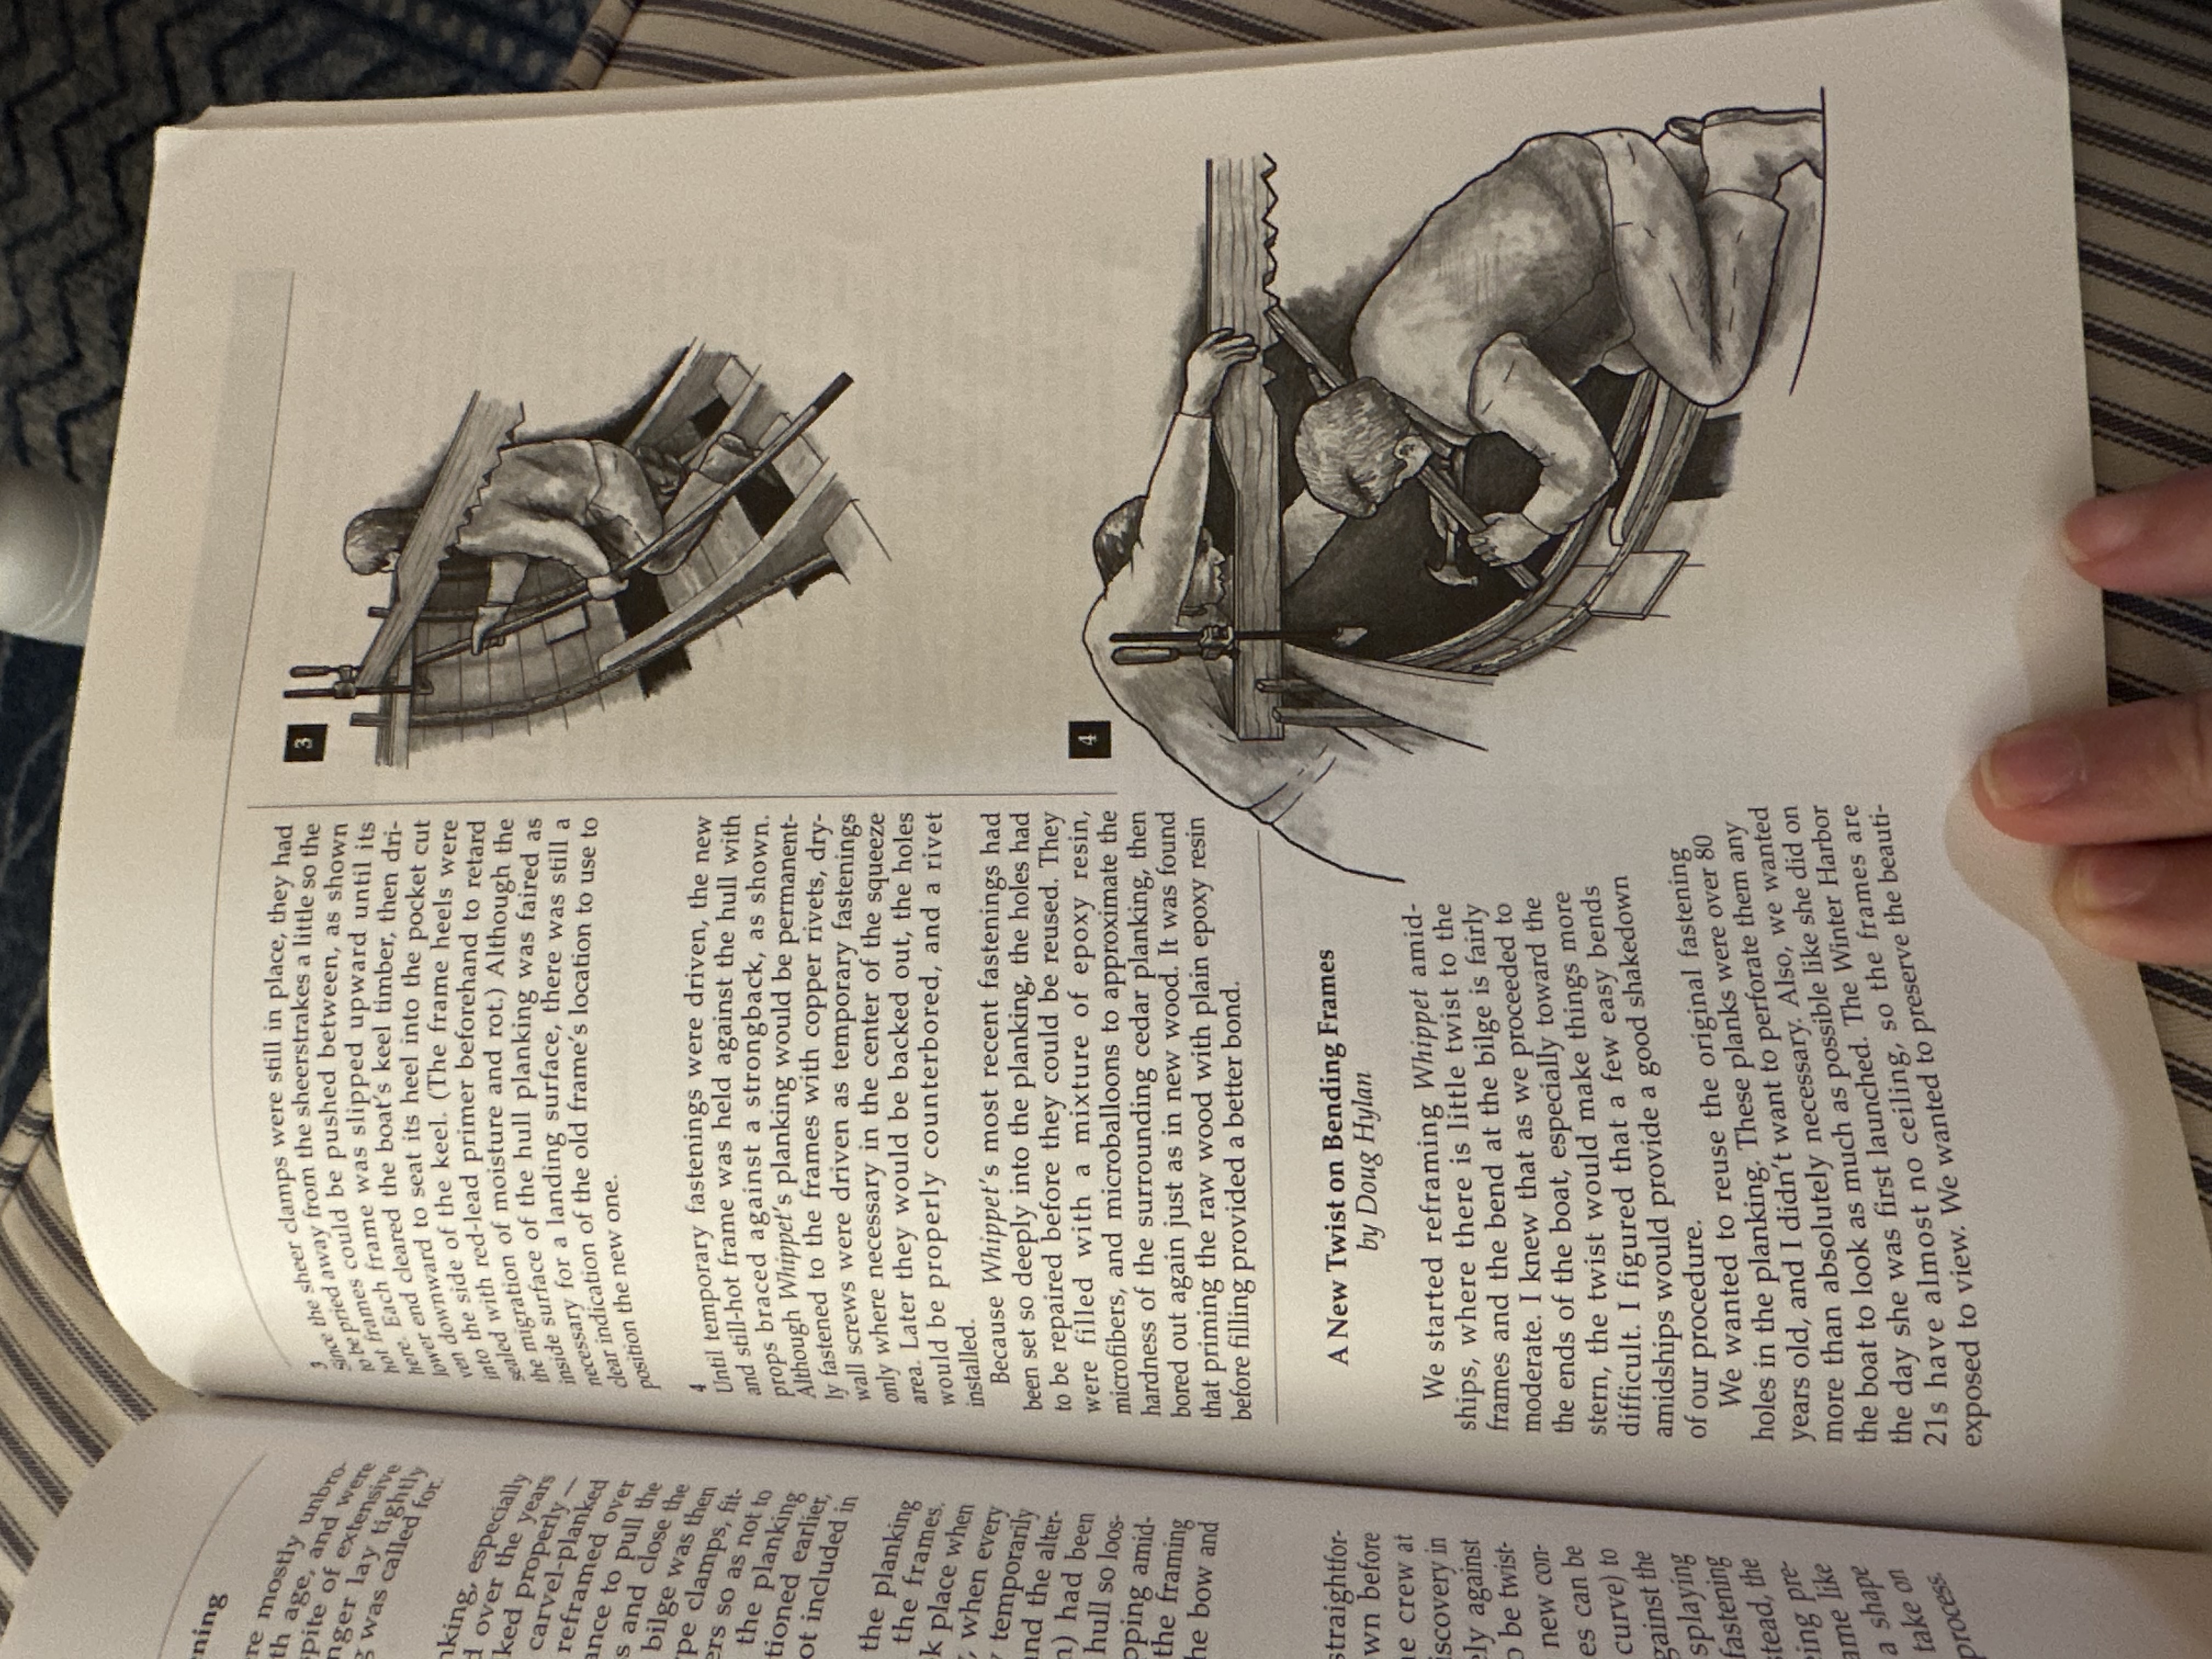
When we replaced the forward frames a few years ago, we laminated them — gluing up thin strips of white oak over a form with epoxy. Lamination produces a strong, stable frame with very little internal stress, but it’s slow, wasteful, and expensive. Each blank needs to be templated, glued up on a custom form, cured overnight, and then shaped and beveled to fit. For the remaining stations, we wanted to try the original method: steam bending.
The to steam bending is access. It’s traditionally done from above during initial construction — you drop the hot frame down through the open deck (where covering boards eventually go) and lever it into position against the planking. Removing Ariadne’s covering boards would be a real pain and likely result in replacing the deck. That’s something we plan to do, but later.
An article in WoodenBoat offered a promising solution: steam then bend the frames from inside the hull, using a metal compression strap for pre-bending and a notched strongback for leverage inside the boat.

Milling stock
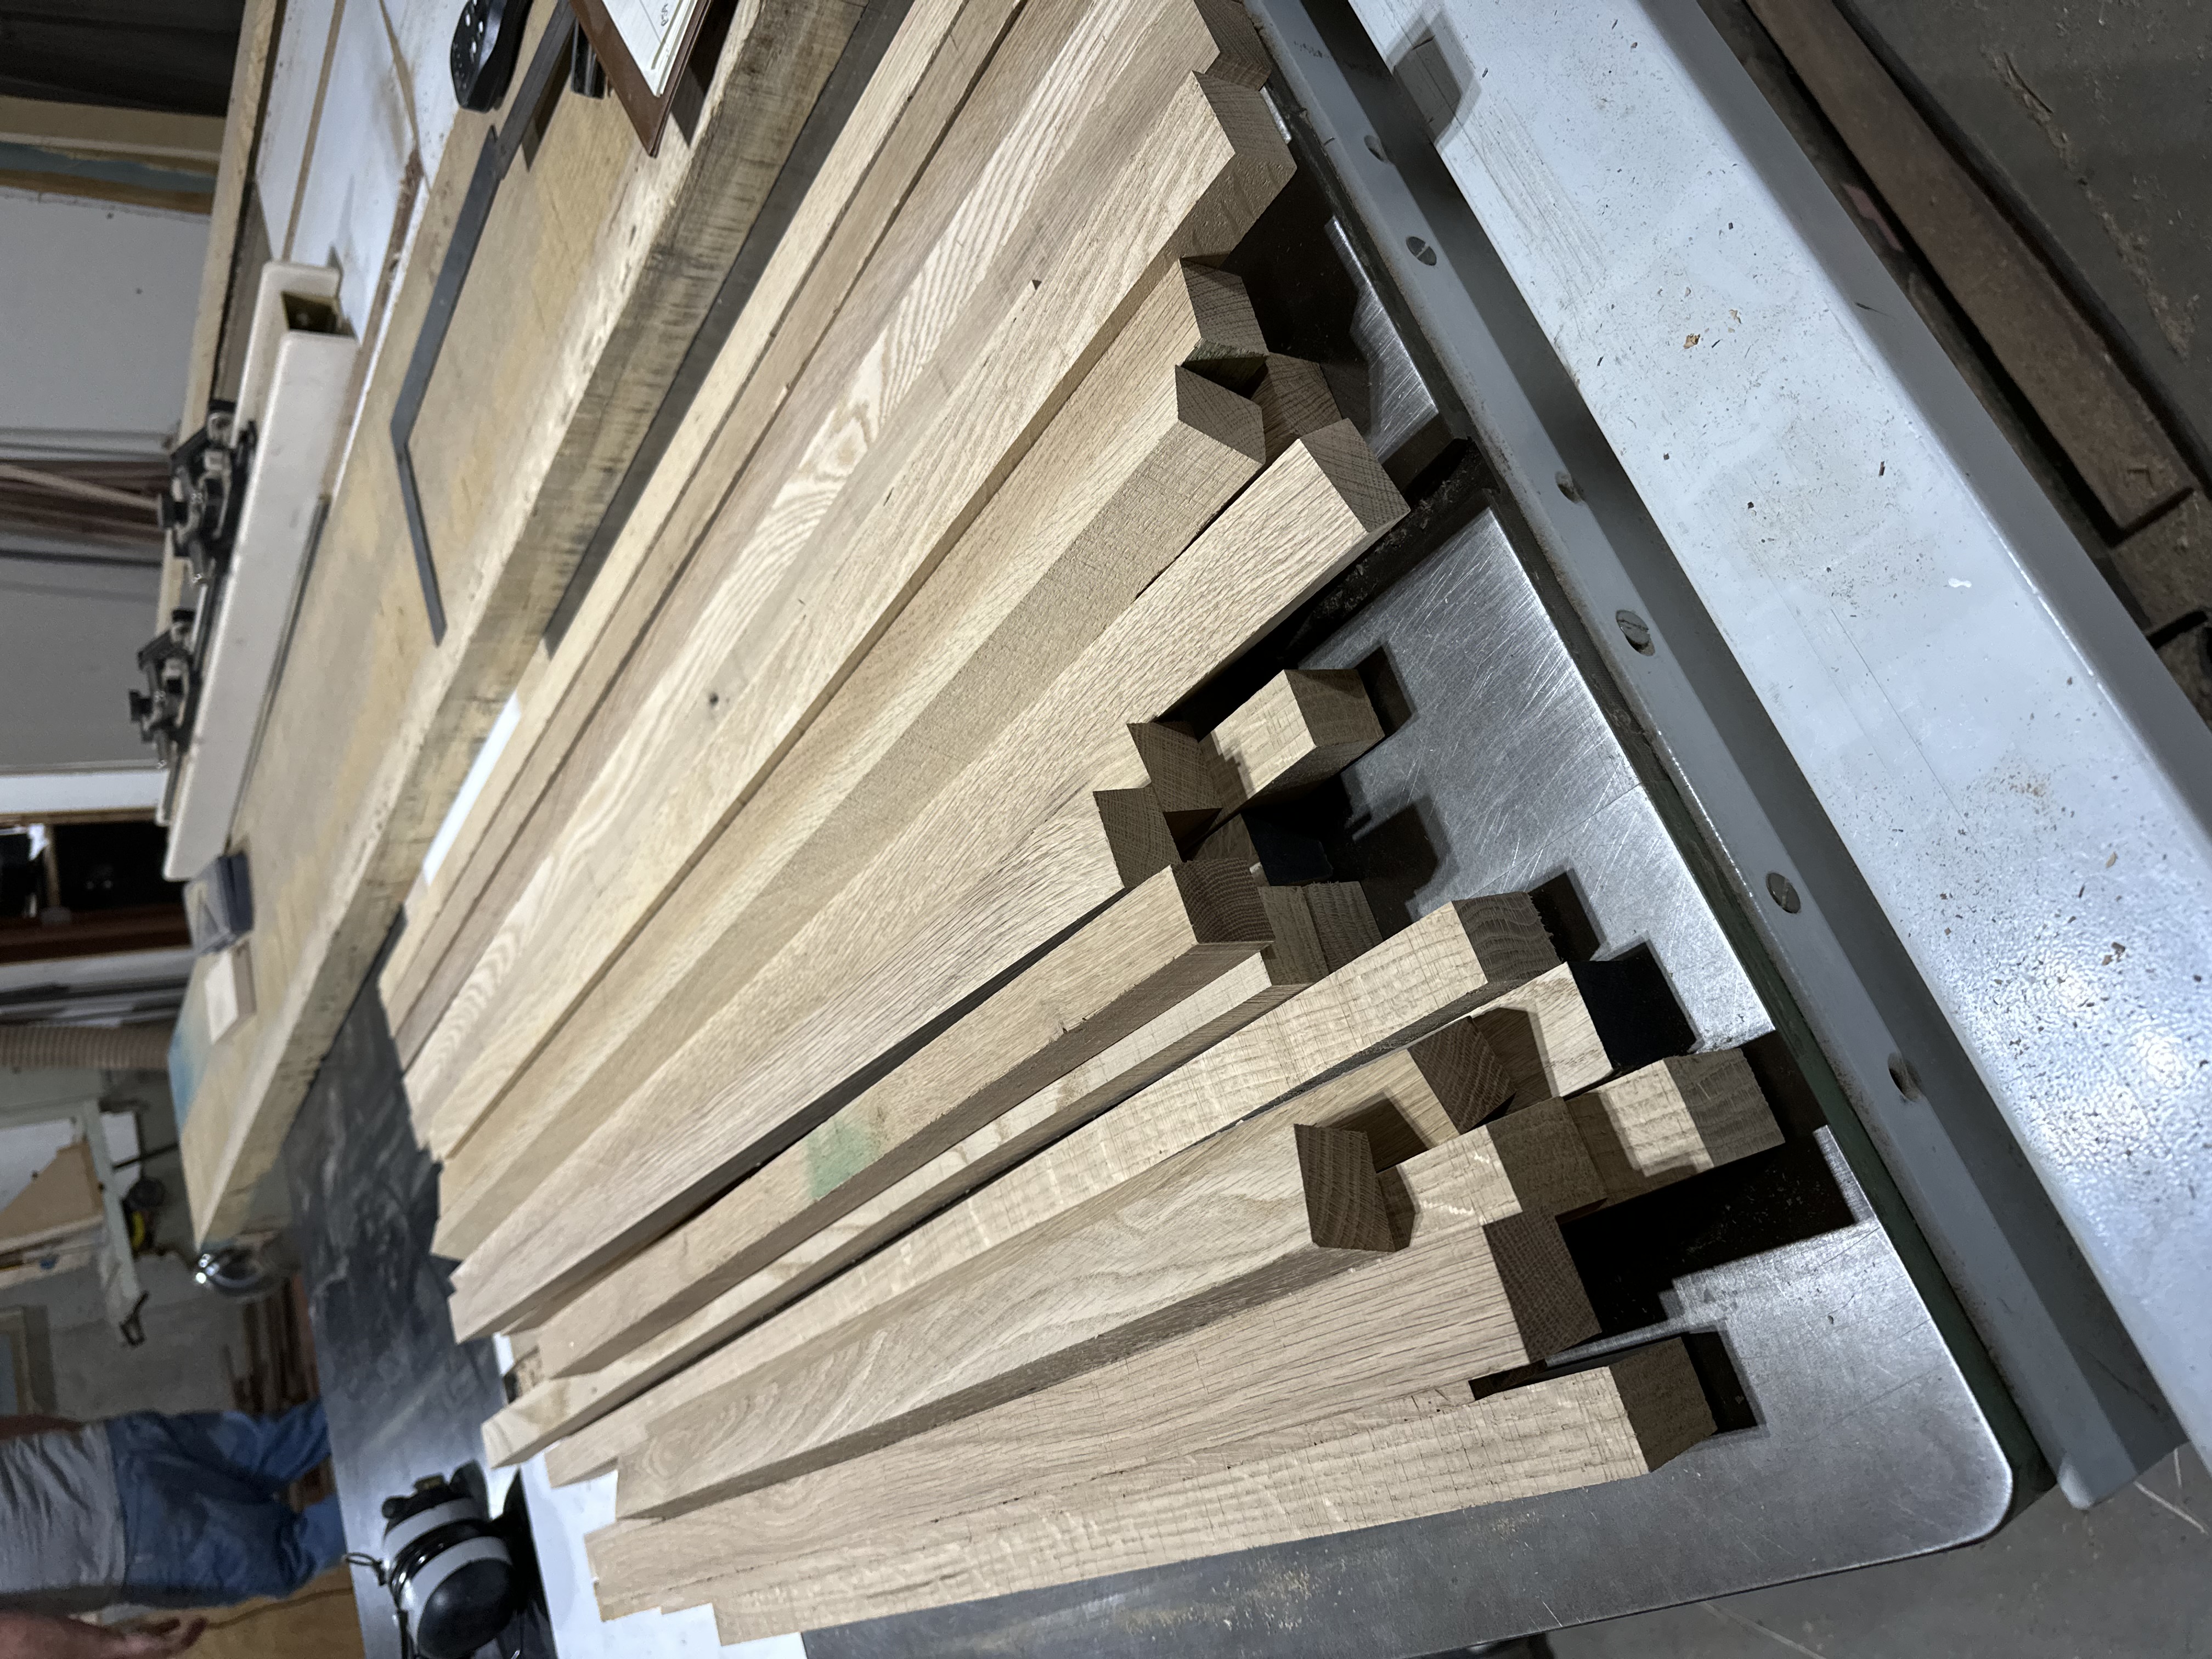
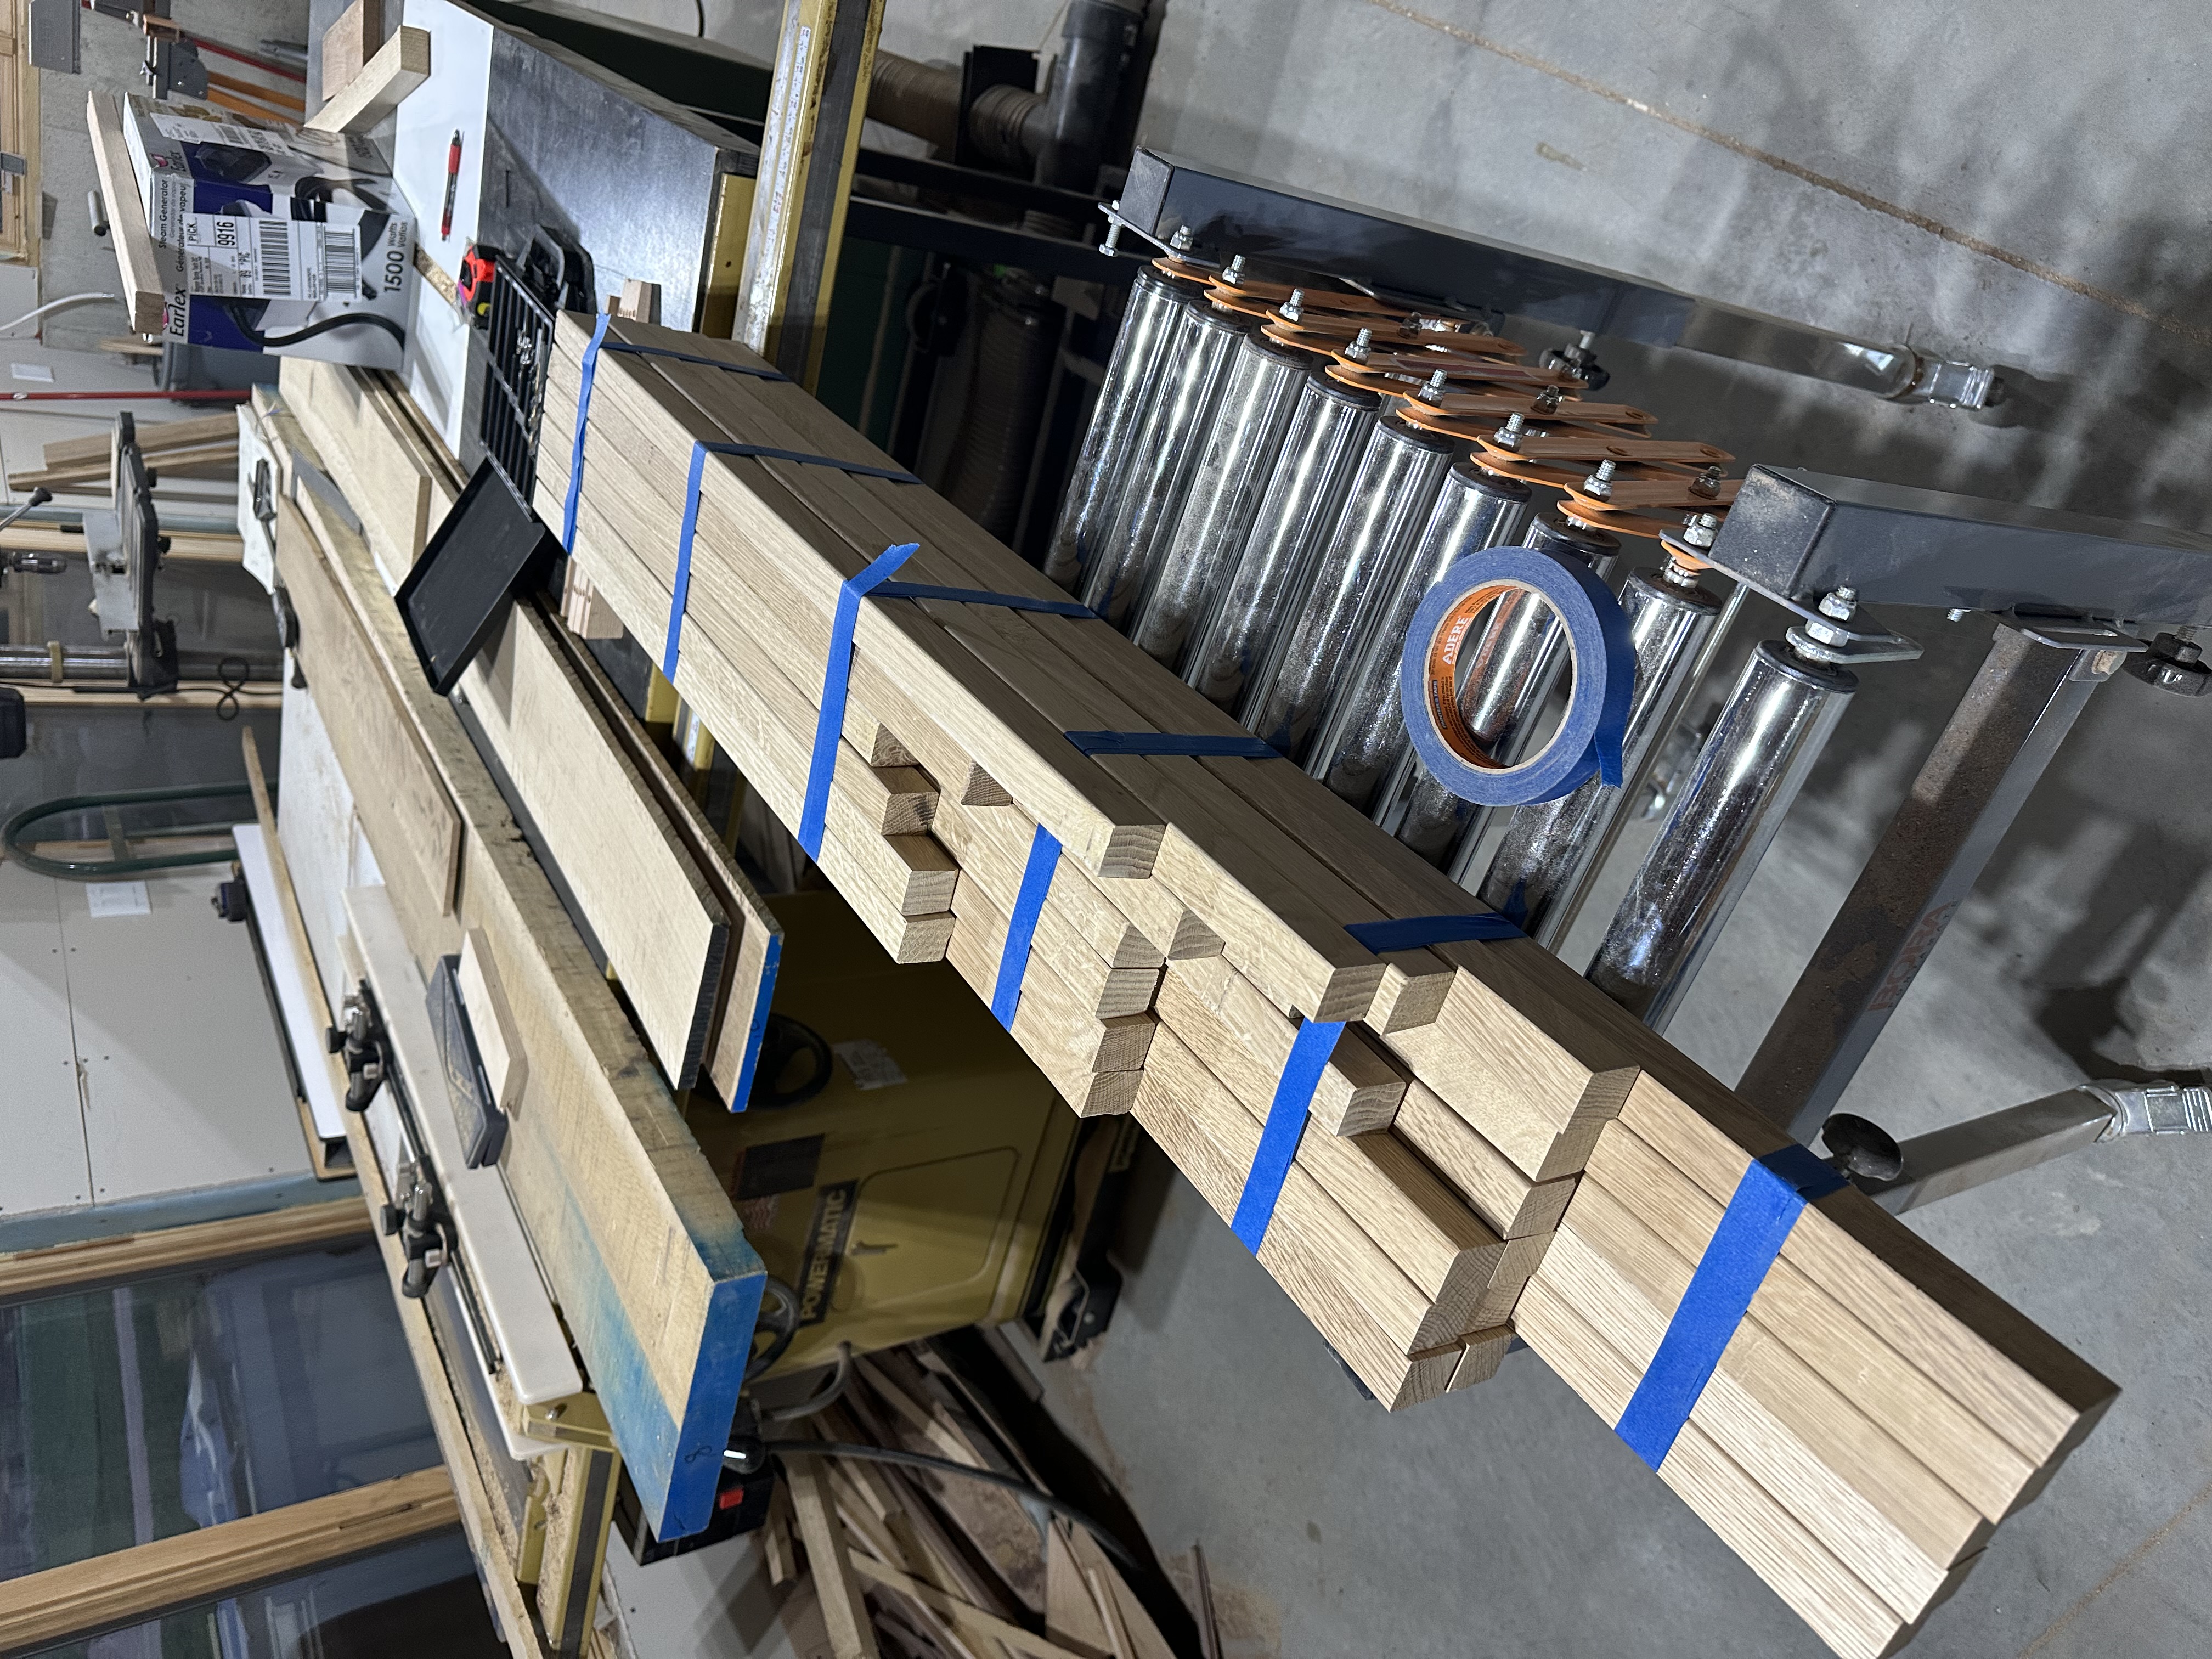
The frame blanks were milled from quartersawn white oak, ripped to the correct cross section on the table saw. Quartersawn matters here — the grain orientation makes the wood more resistant to splitting when it’s forced around a curve, and more dimensionally stable once it’s in the boat. Runout is deadly and will lead to breakages during pre-bend. Even with perfect stock, you expect about a quarter of your blanks to fail.
Testing
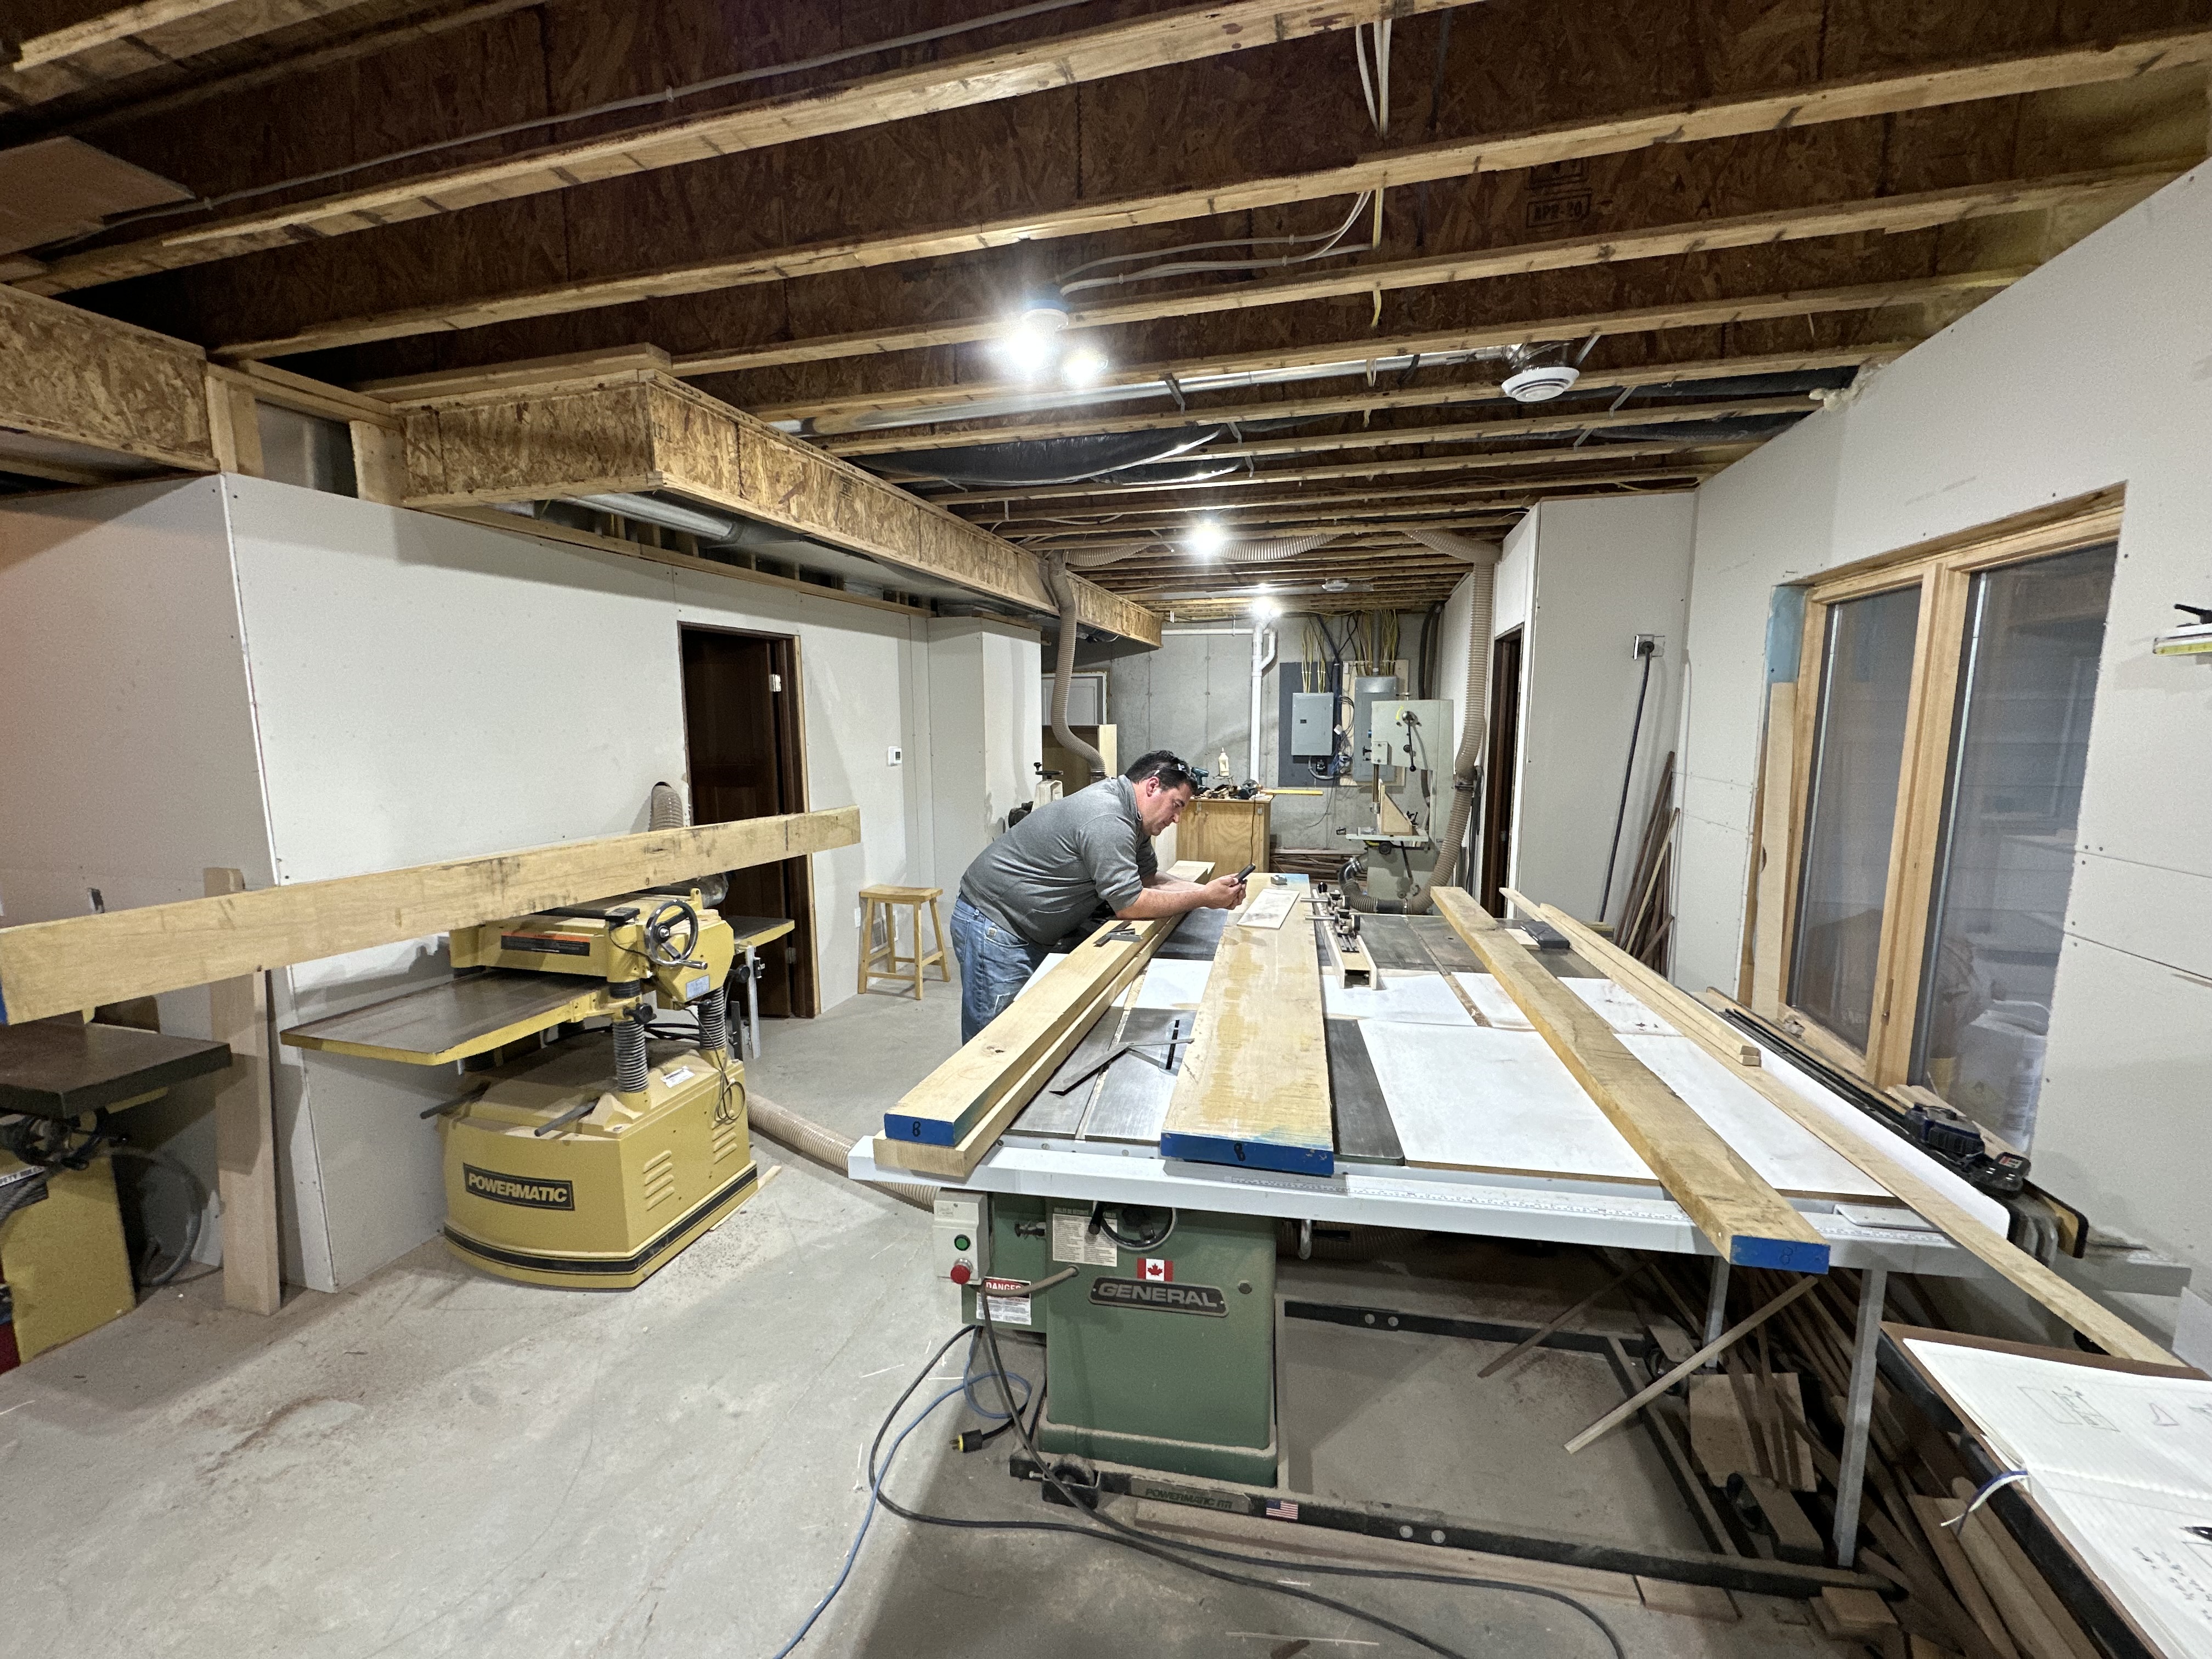
We built our own bending strap and leverage strongback based on the references above, along with a homemade steam box from heavy poly sheeting and a wallpaper steamer. The apparatus was a little janky but quite effective.
After dialing in the compression strap and how heavily to pre-bend, the shop tests went beautifully. Frame blanks came out of the steam box pliable and cooperative, bent cleanly around our forms, and set without much springback. We were feeling confident.
Testing the steam bending apparatus. Frame blanks come out of the homemade steam box and are bent using our bending strap and leverage strongback. The first test bends came out clean — no fractures.
Best laid plans
Then we tried it in the boat. And it didn’t work.
The problem wasn’t the steam box or the bending strap — those performed fine. The problem was the confined space inside the hull. Bending a frame on an open table with full leverage and room to maneuver is one thing. Bending it in the cramped interior of a thirty-foot sailboat, working under the covering boards with limited swing, is something else entirely. We couldn’t get the blanks around the tighter curves fast enough. By the time we had the strap positioned and the leverage right, the wood had cooled past the point of no return.
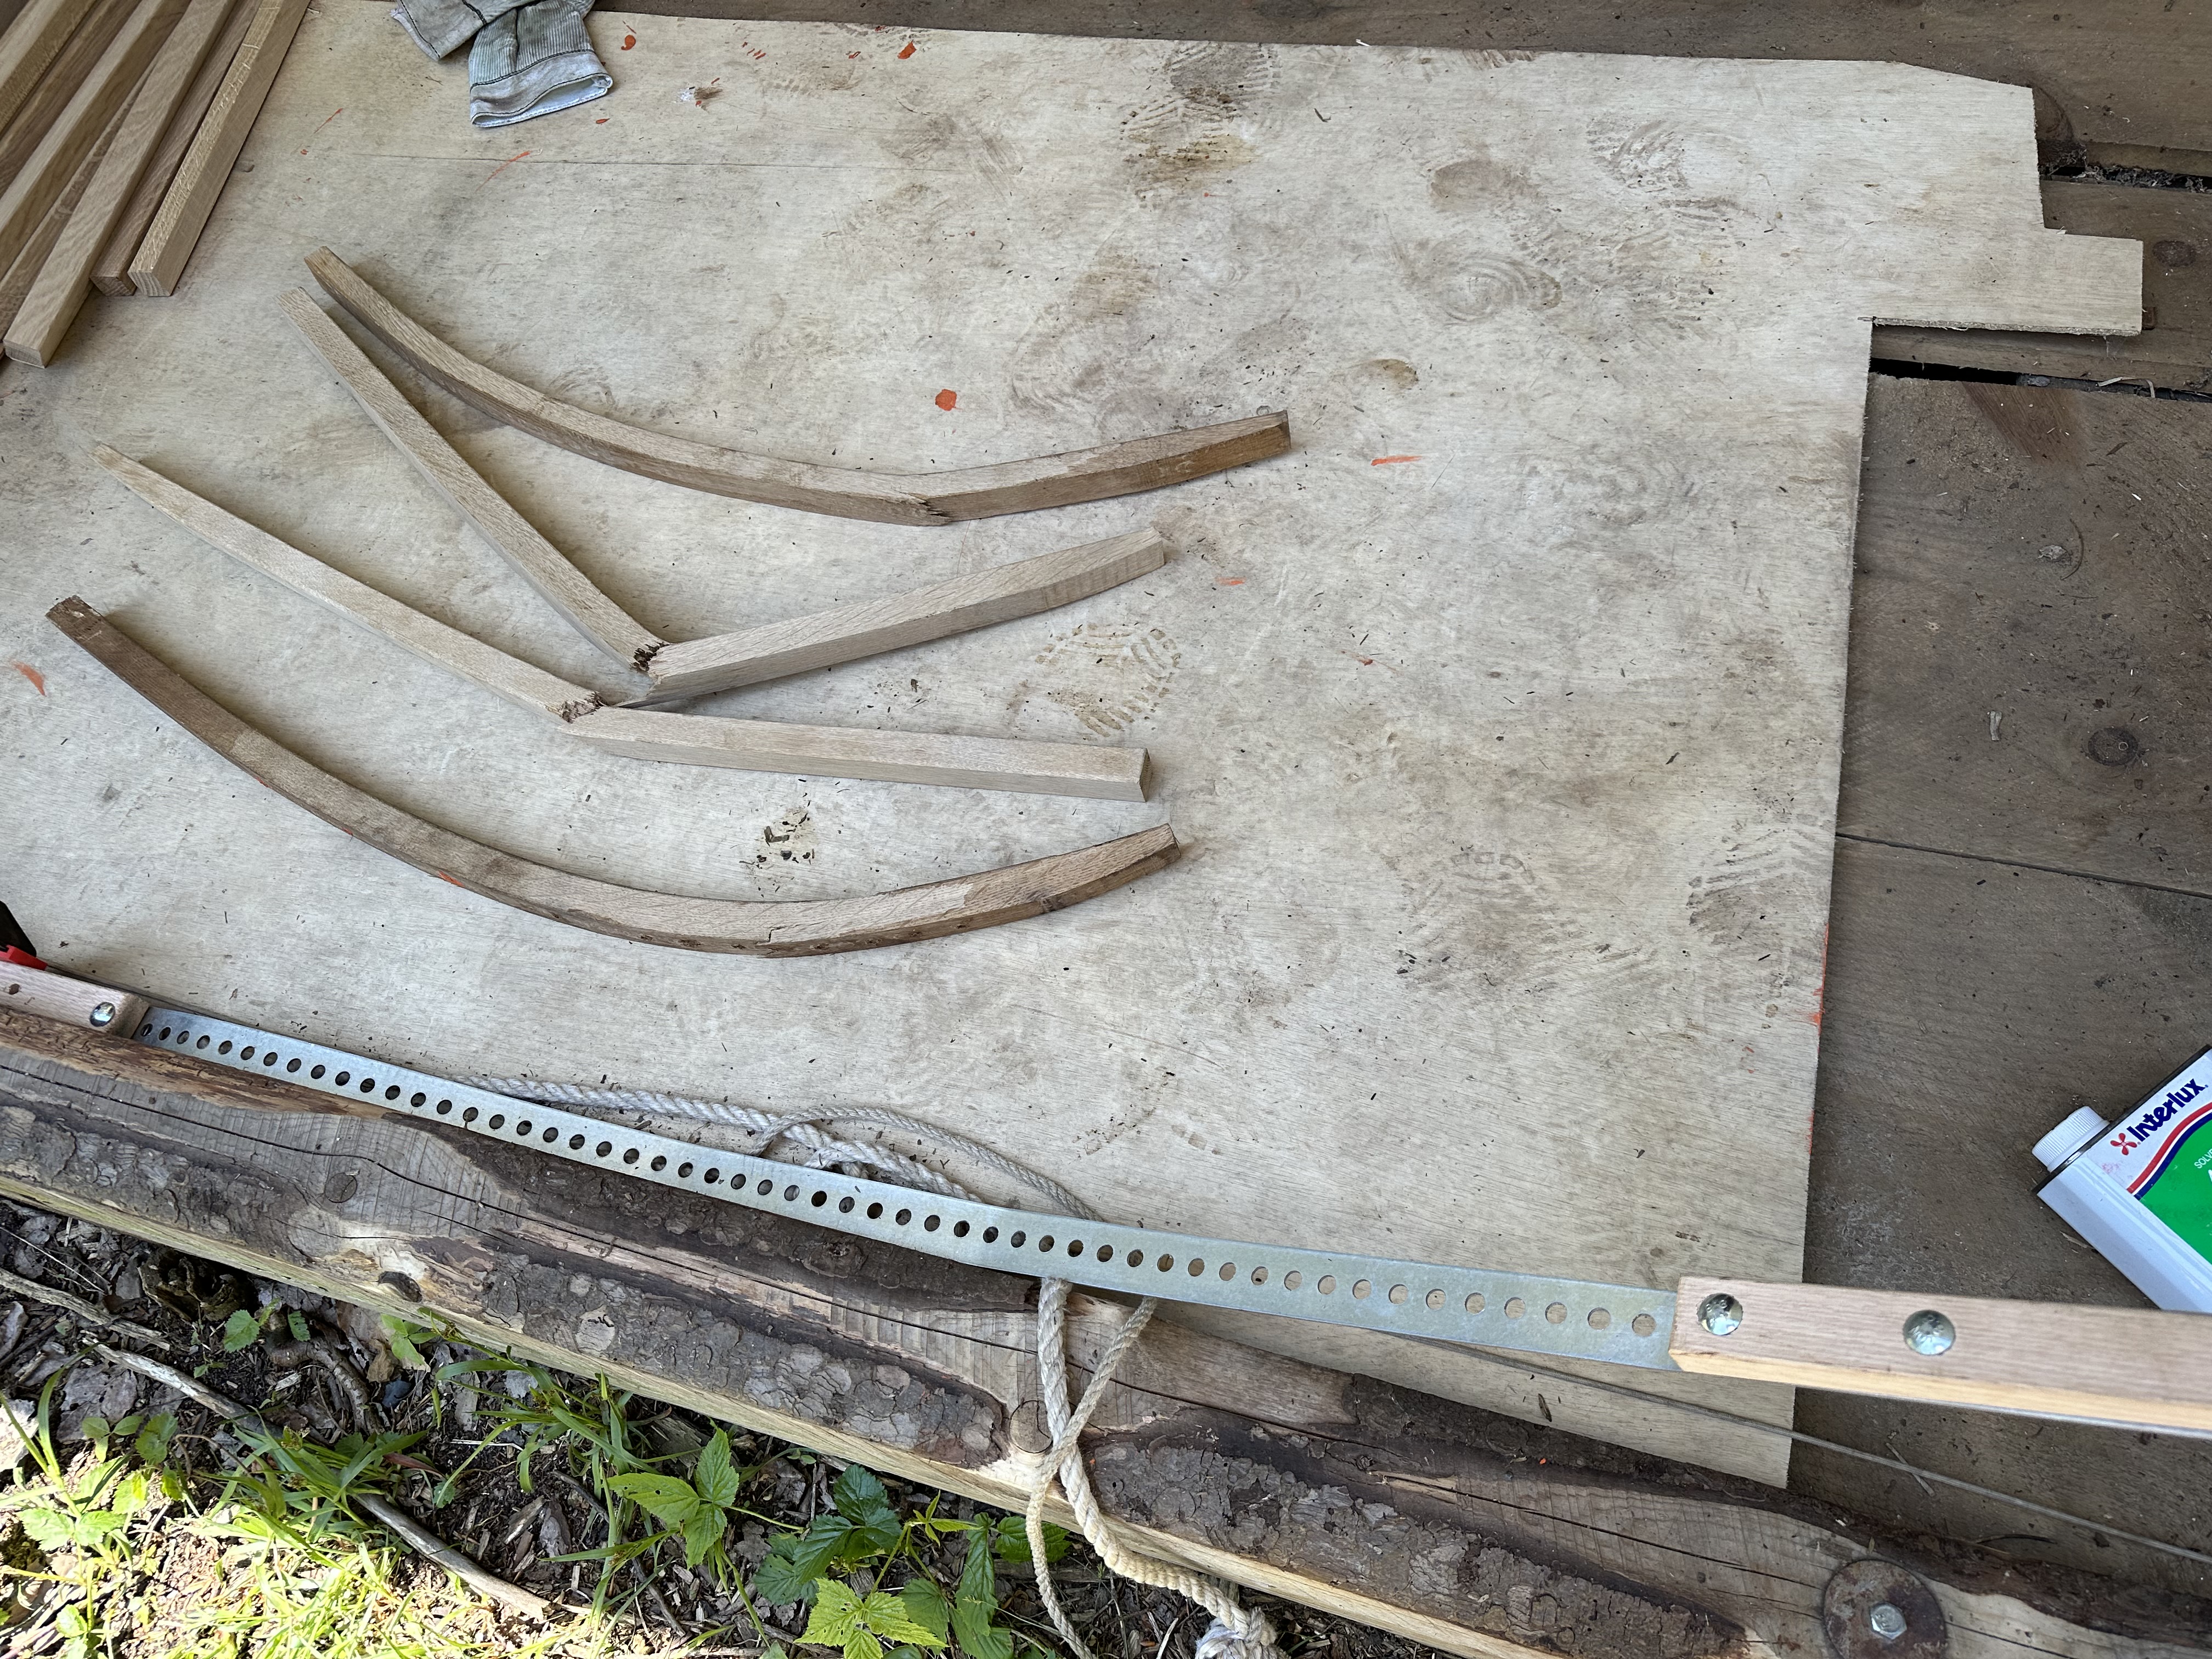
We ran through a discouraging amount of good white oak before accepting that this approach, however elegant in theory, wasn’t going to work in our situation.
Plan B: lamination in place
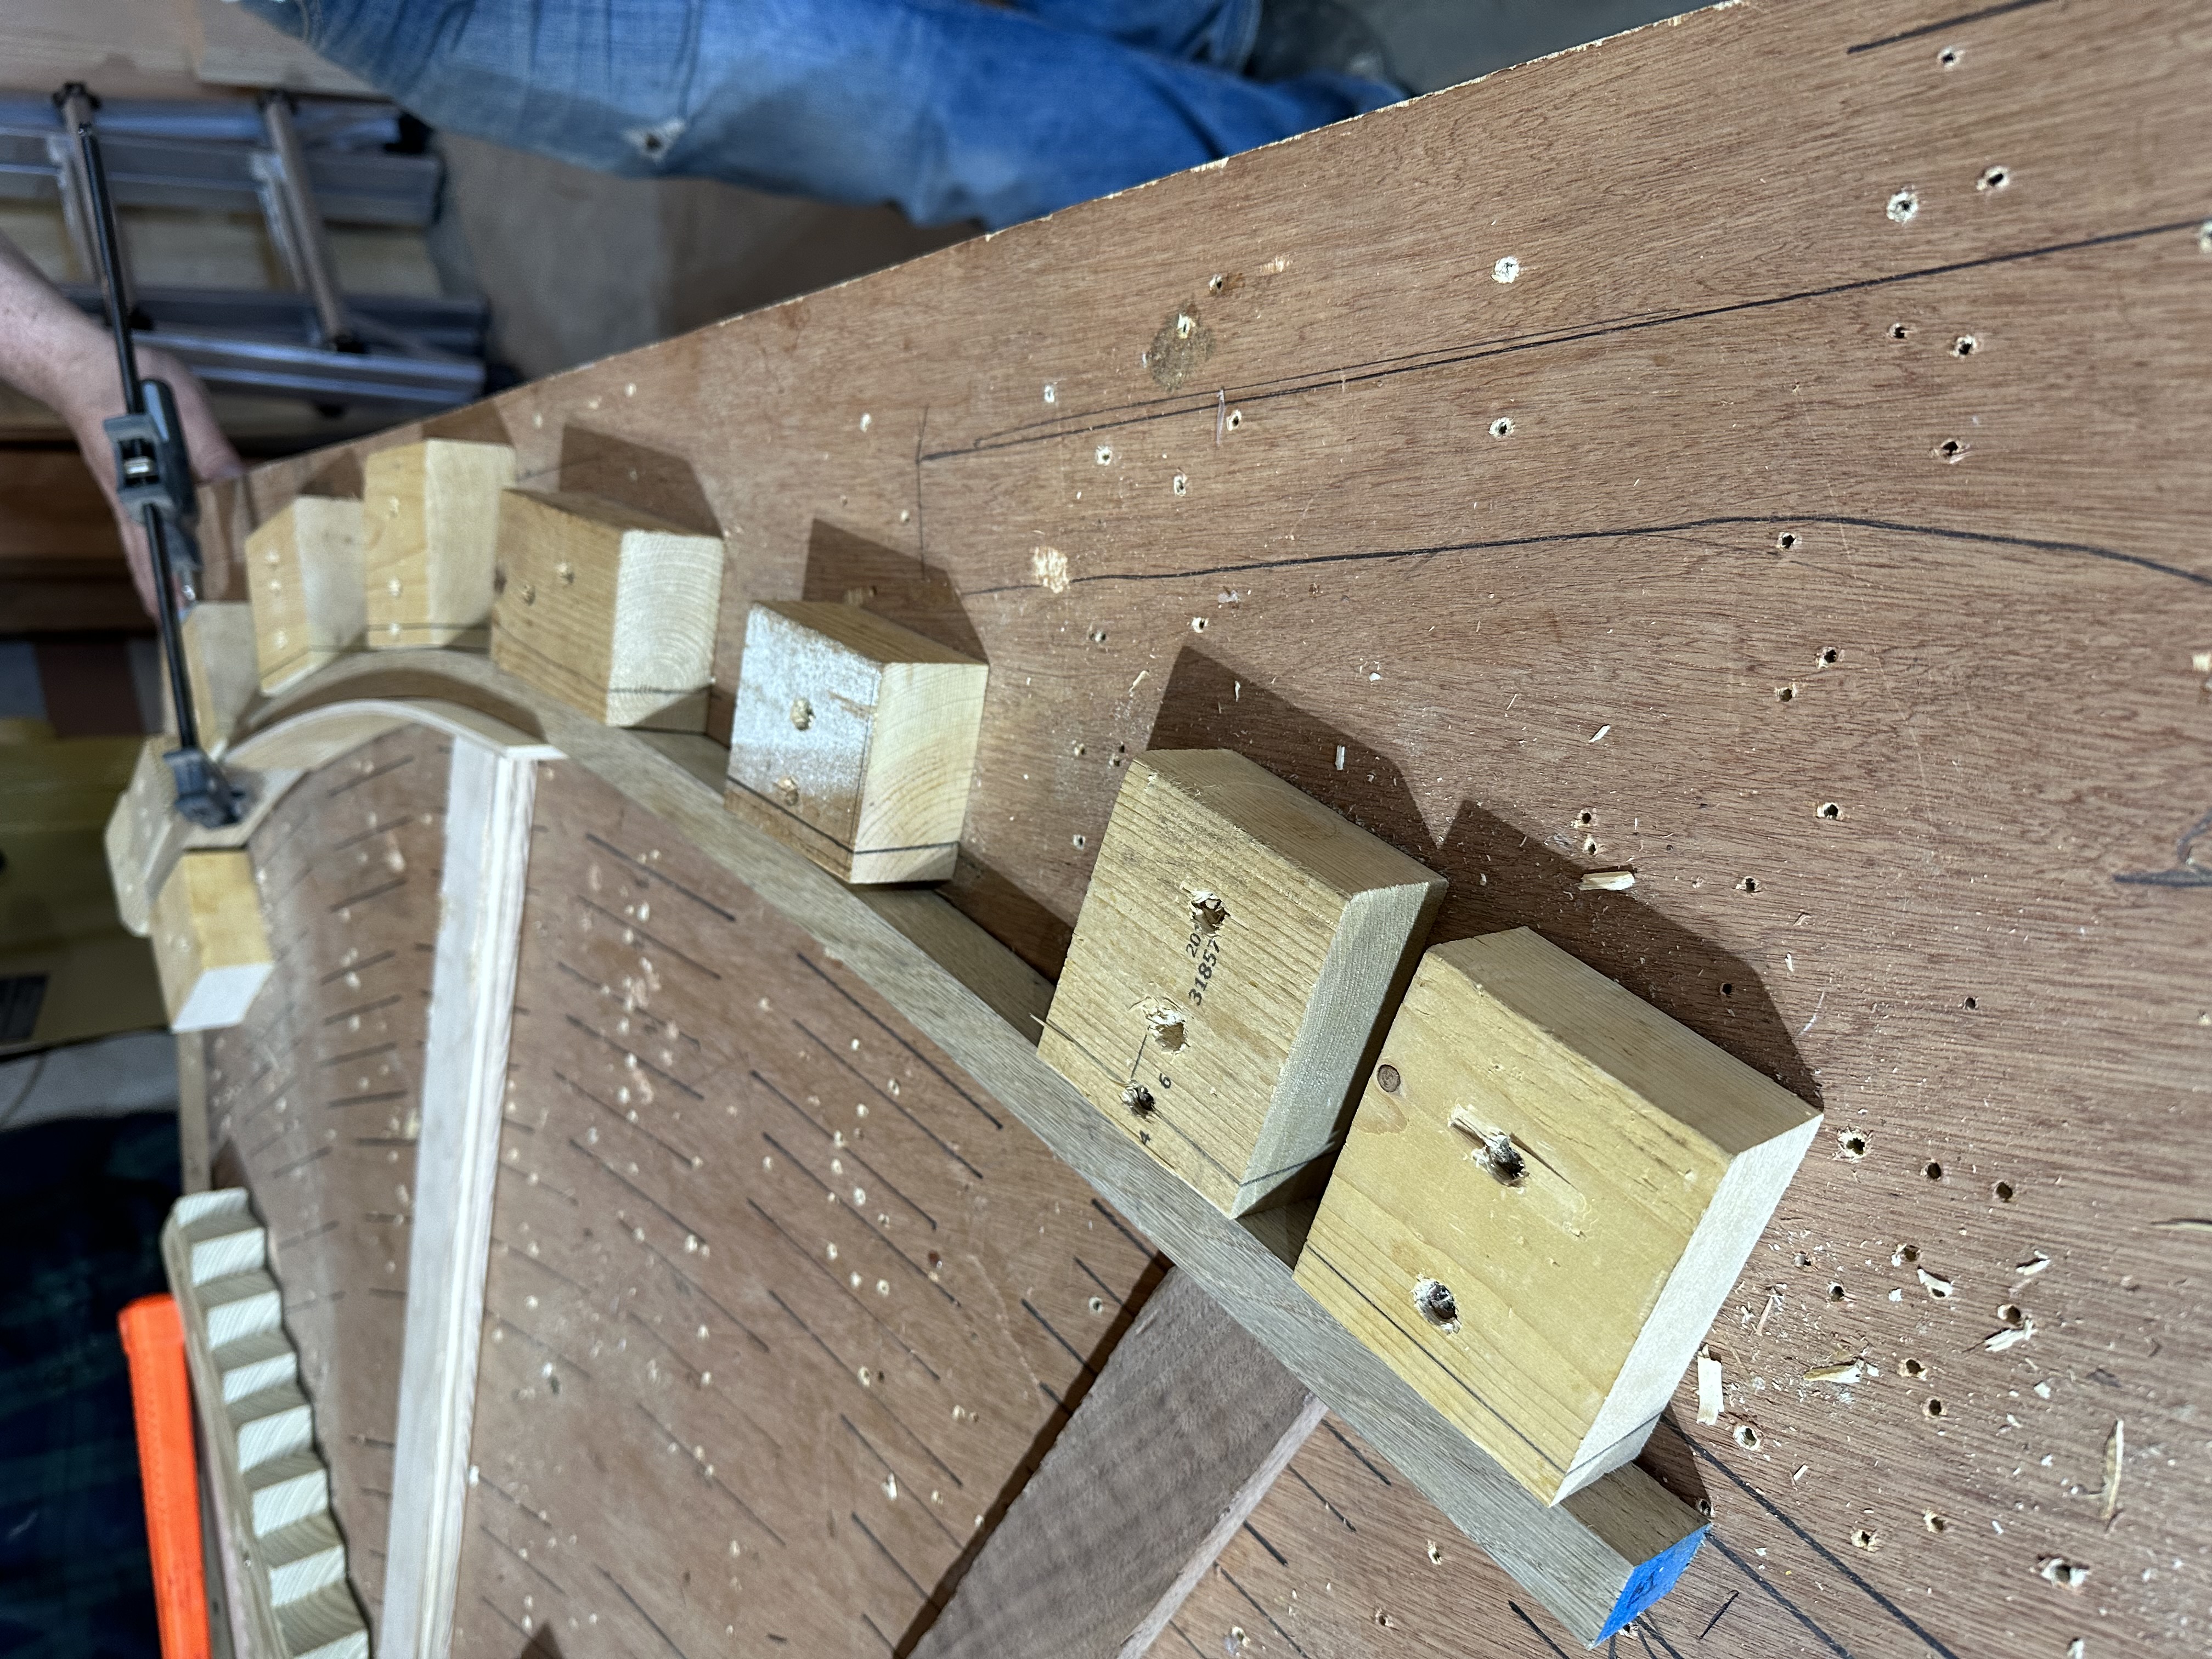
So we went back to what we knew worked — lamination — but adapted the technique for speed. Instead of building custom forms for each station, we laminated the frames in place: thin strips of white oak laid up directly against the planking inside the hull, then clamped from the inside out with blocks screwed through existing fastener holes in the planking to hold the lamination tight against the hull while the epoxy cured. It’s less elegant than steam bending, but it works.
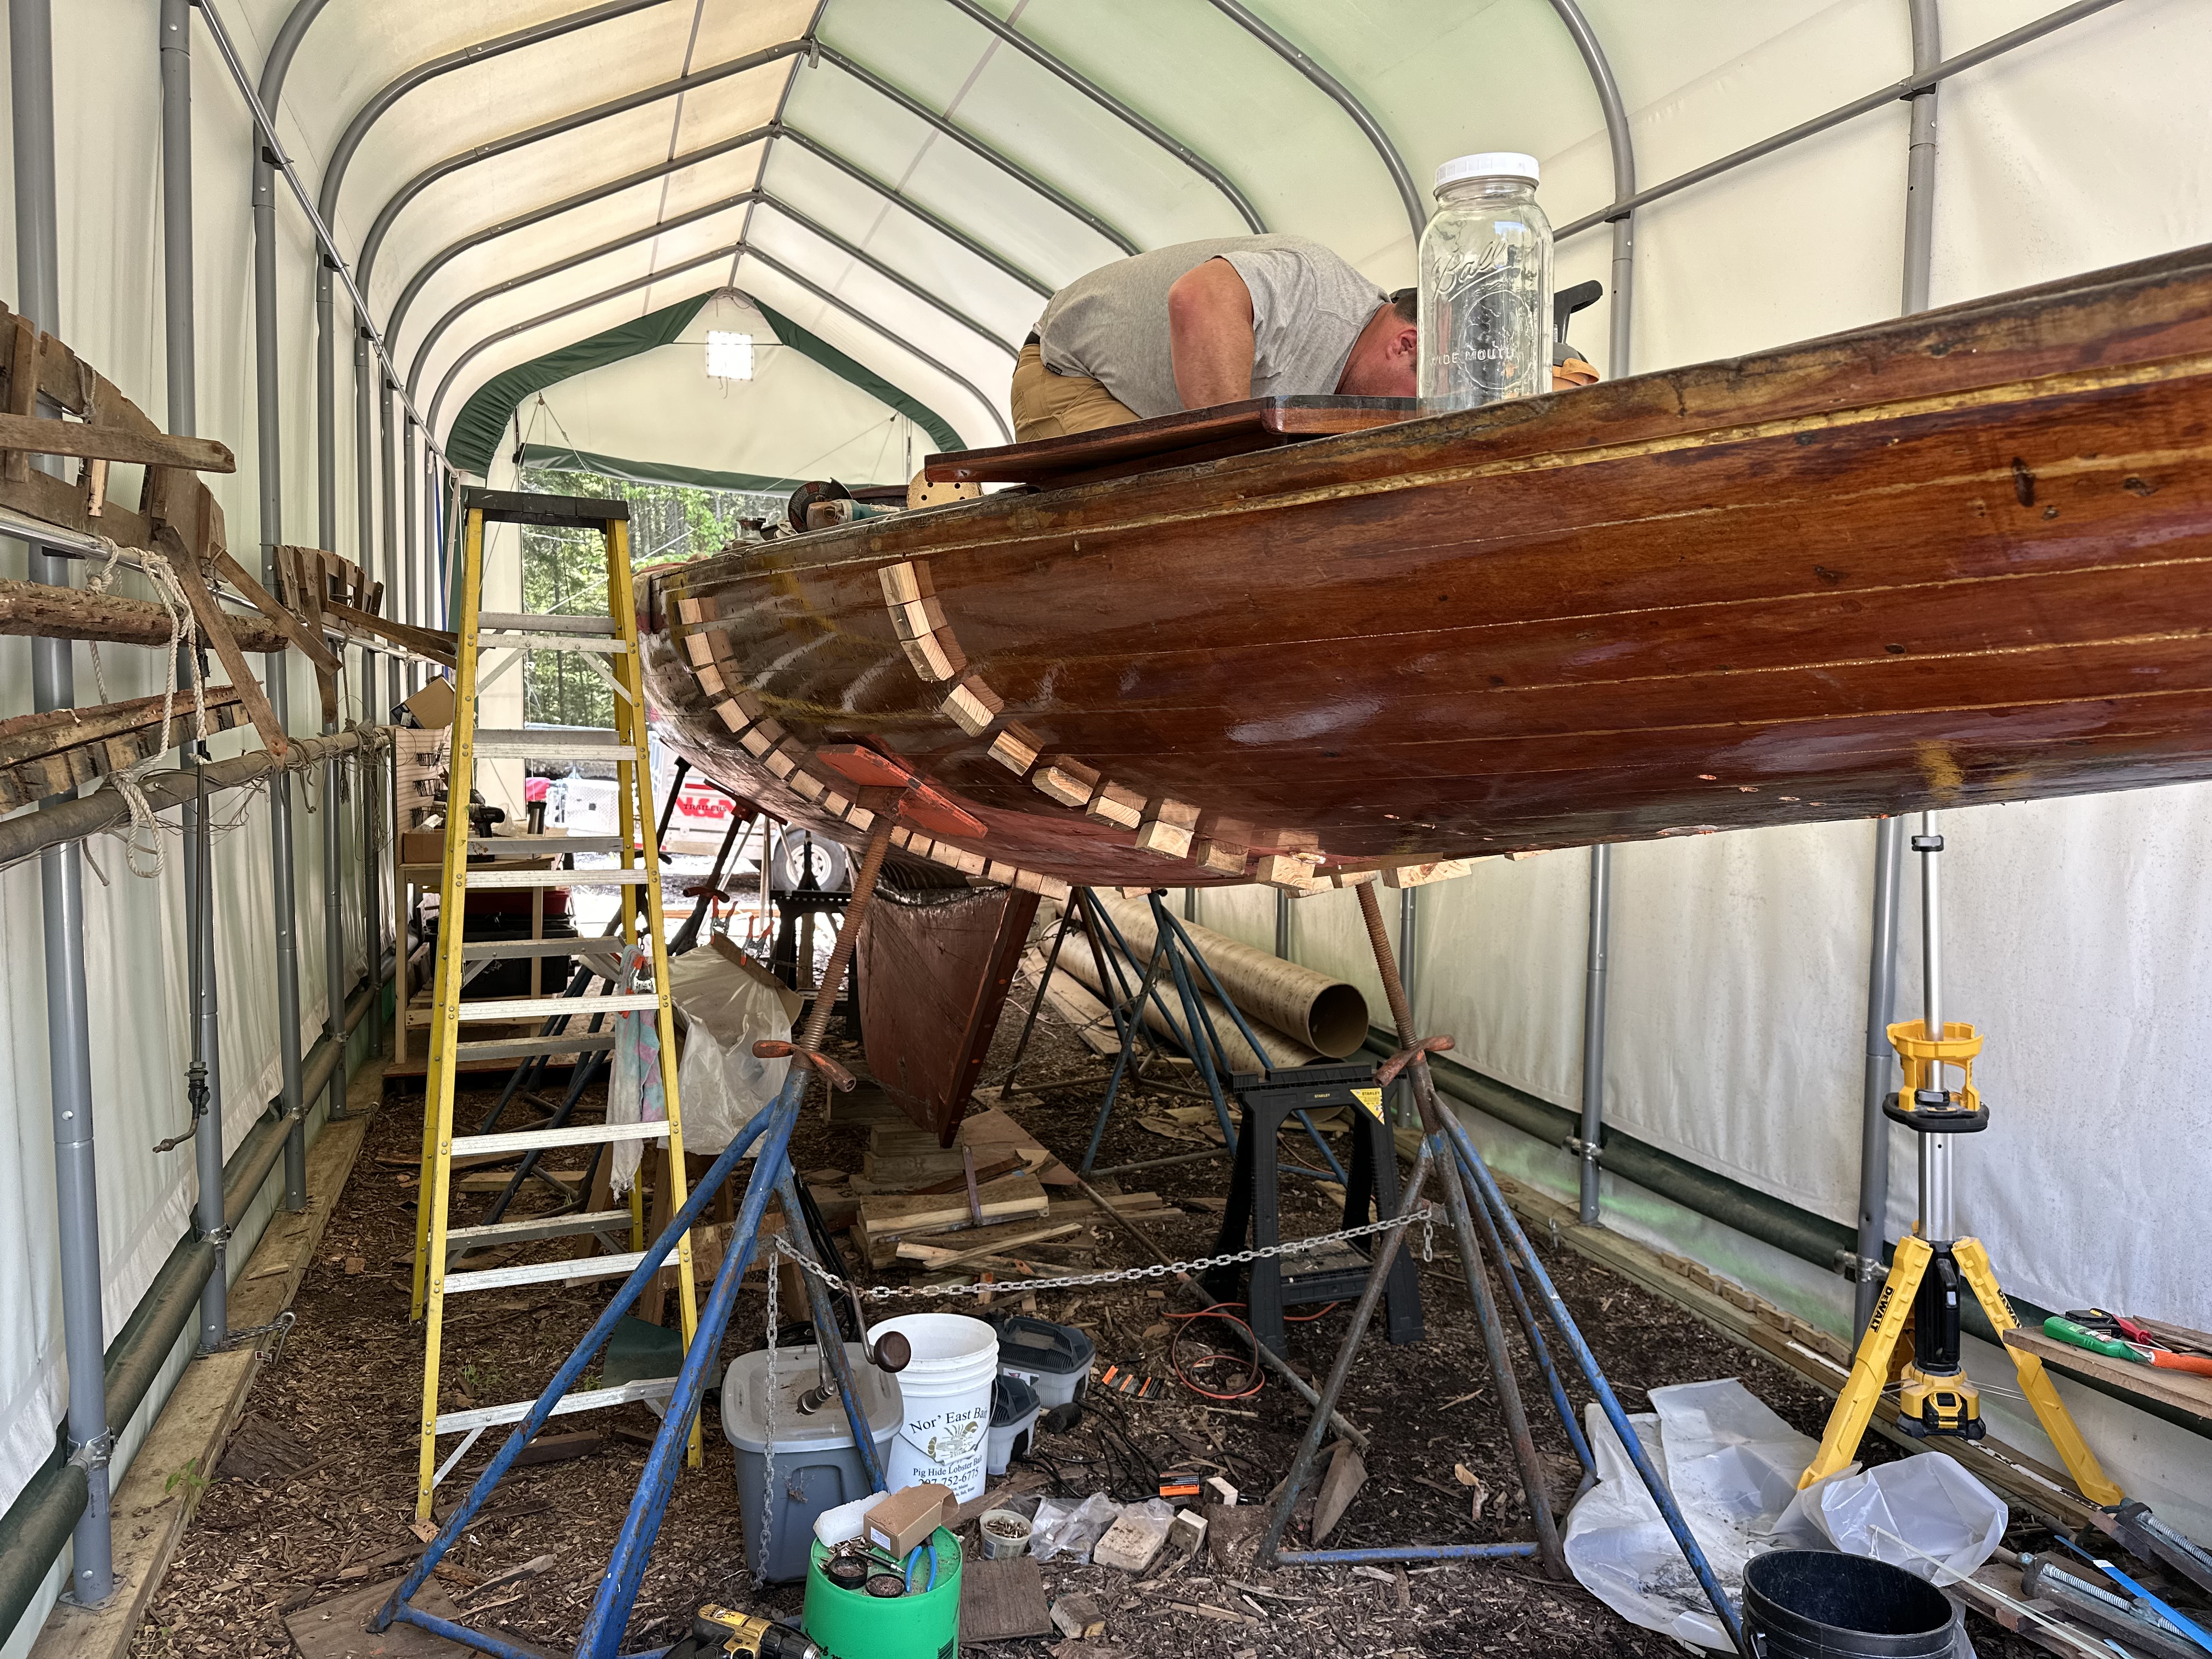
Out with the old

With nearly all frames replaced, the boat has become noticeably stiffer. You can feel it when you walk on deck or push on the planking — where it used to flex and creak, it now feels solid.
Like much of boatbuilding, framing is not glamorous work. It can be repetitive and messy. And sometimes when you have a plan, the boat says no. The frames got done, just not the way we planned. With her skeleton mostly rebuilt, we can move on to planking repairs and start thinking seriously about when this boat touches water again.